We offer a 30 days Free Return
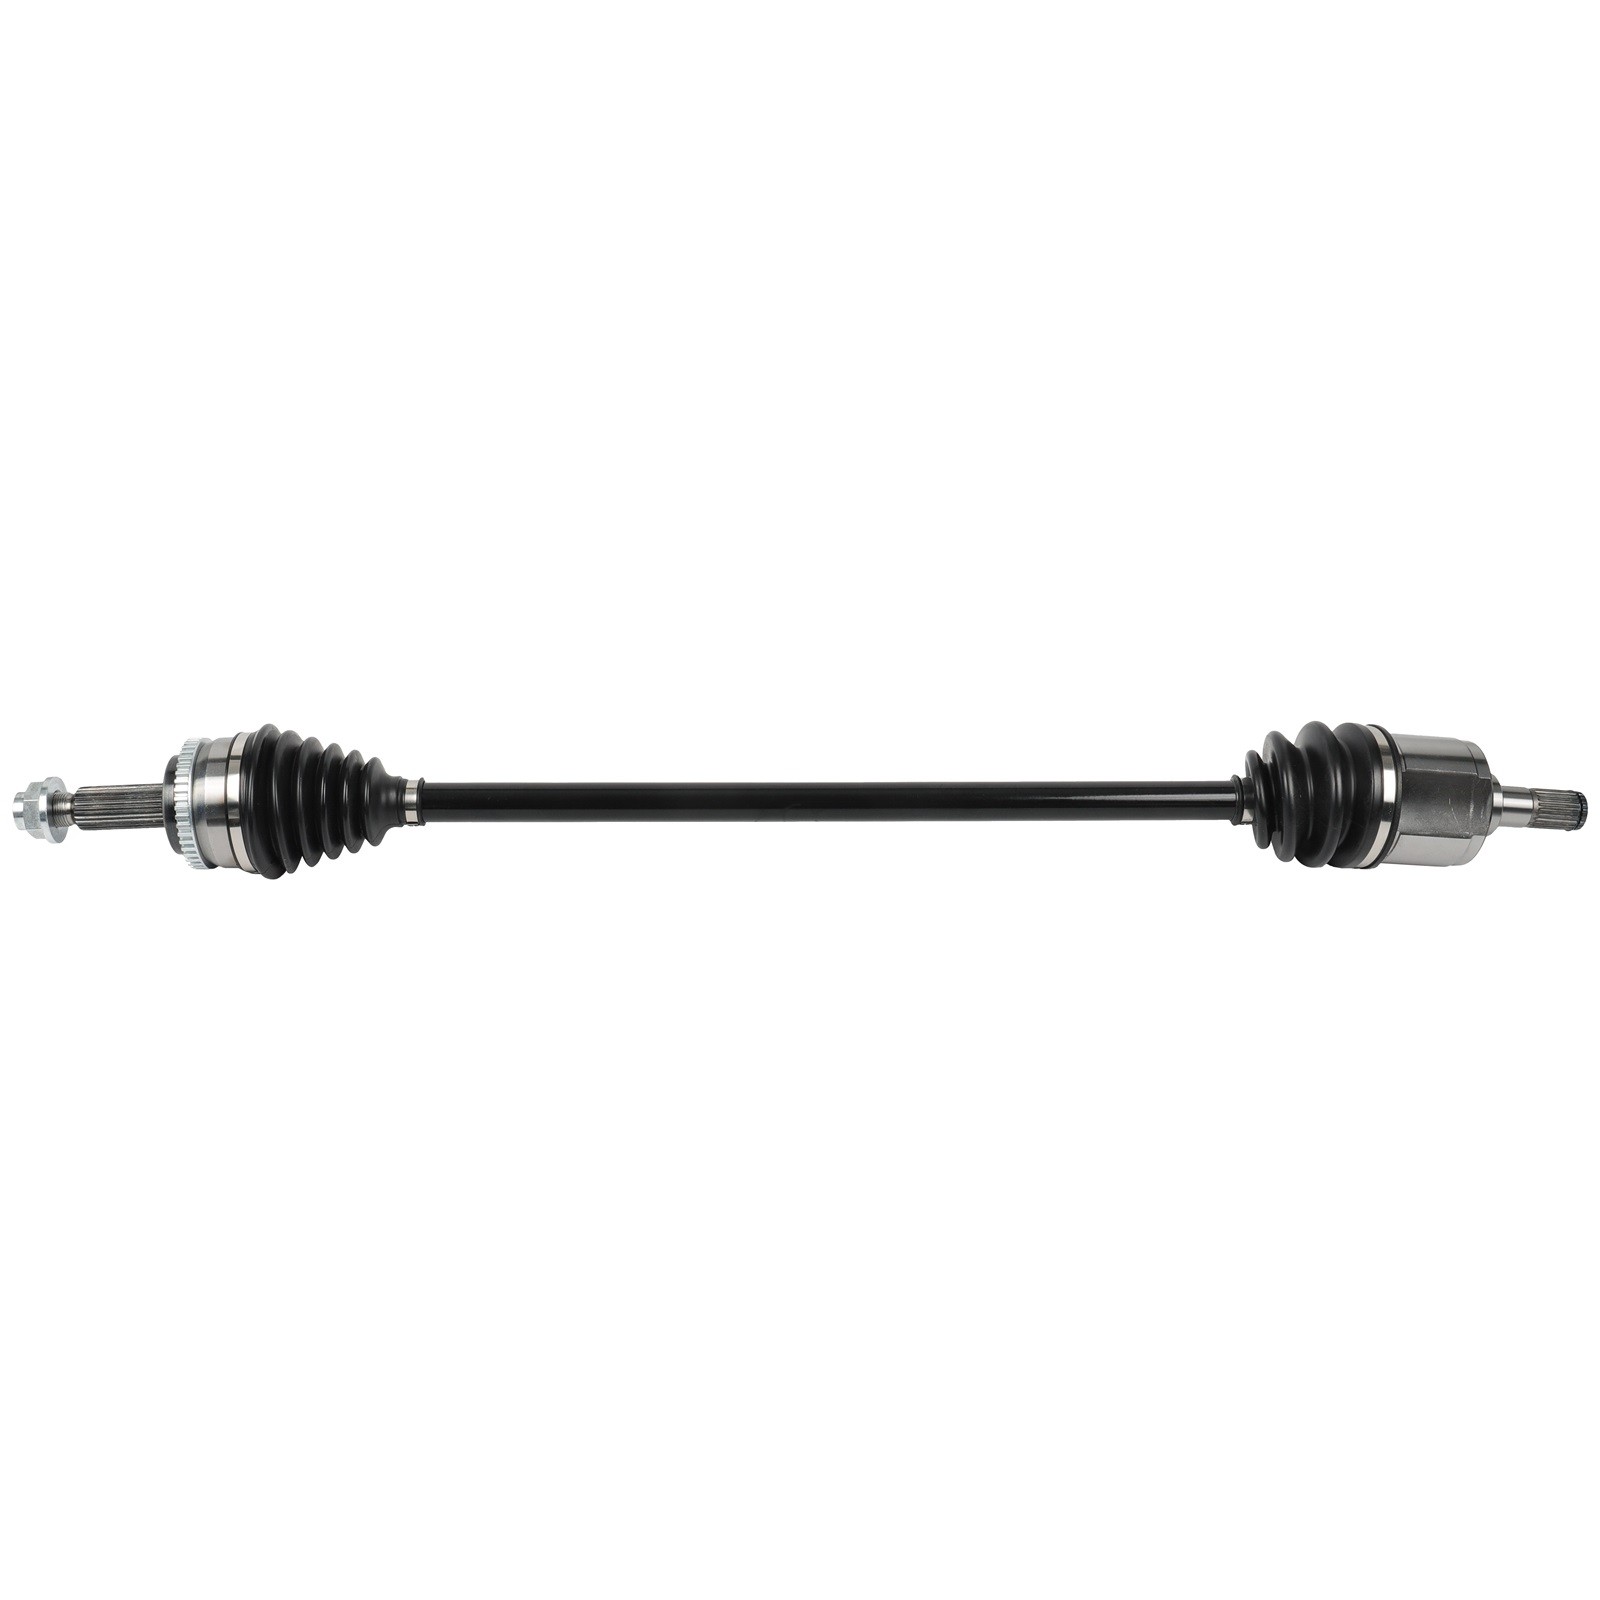
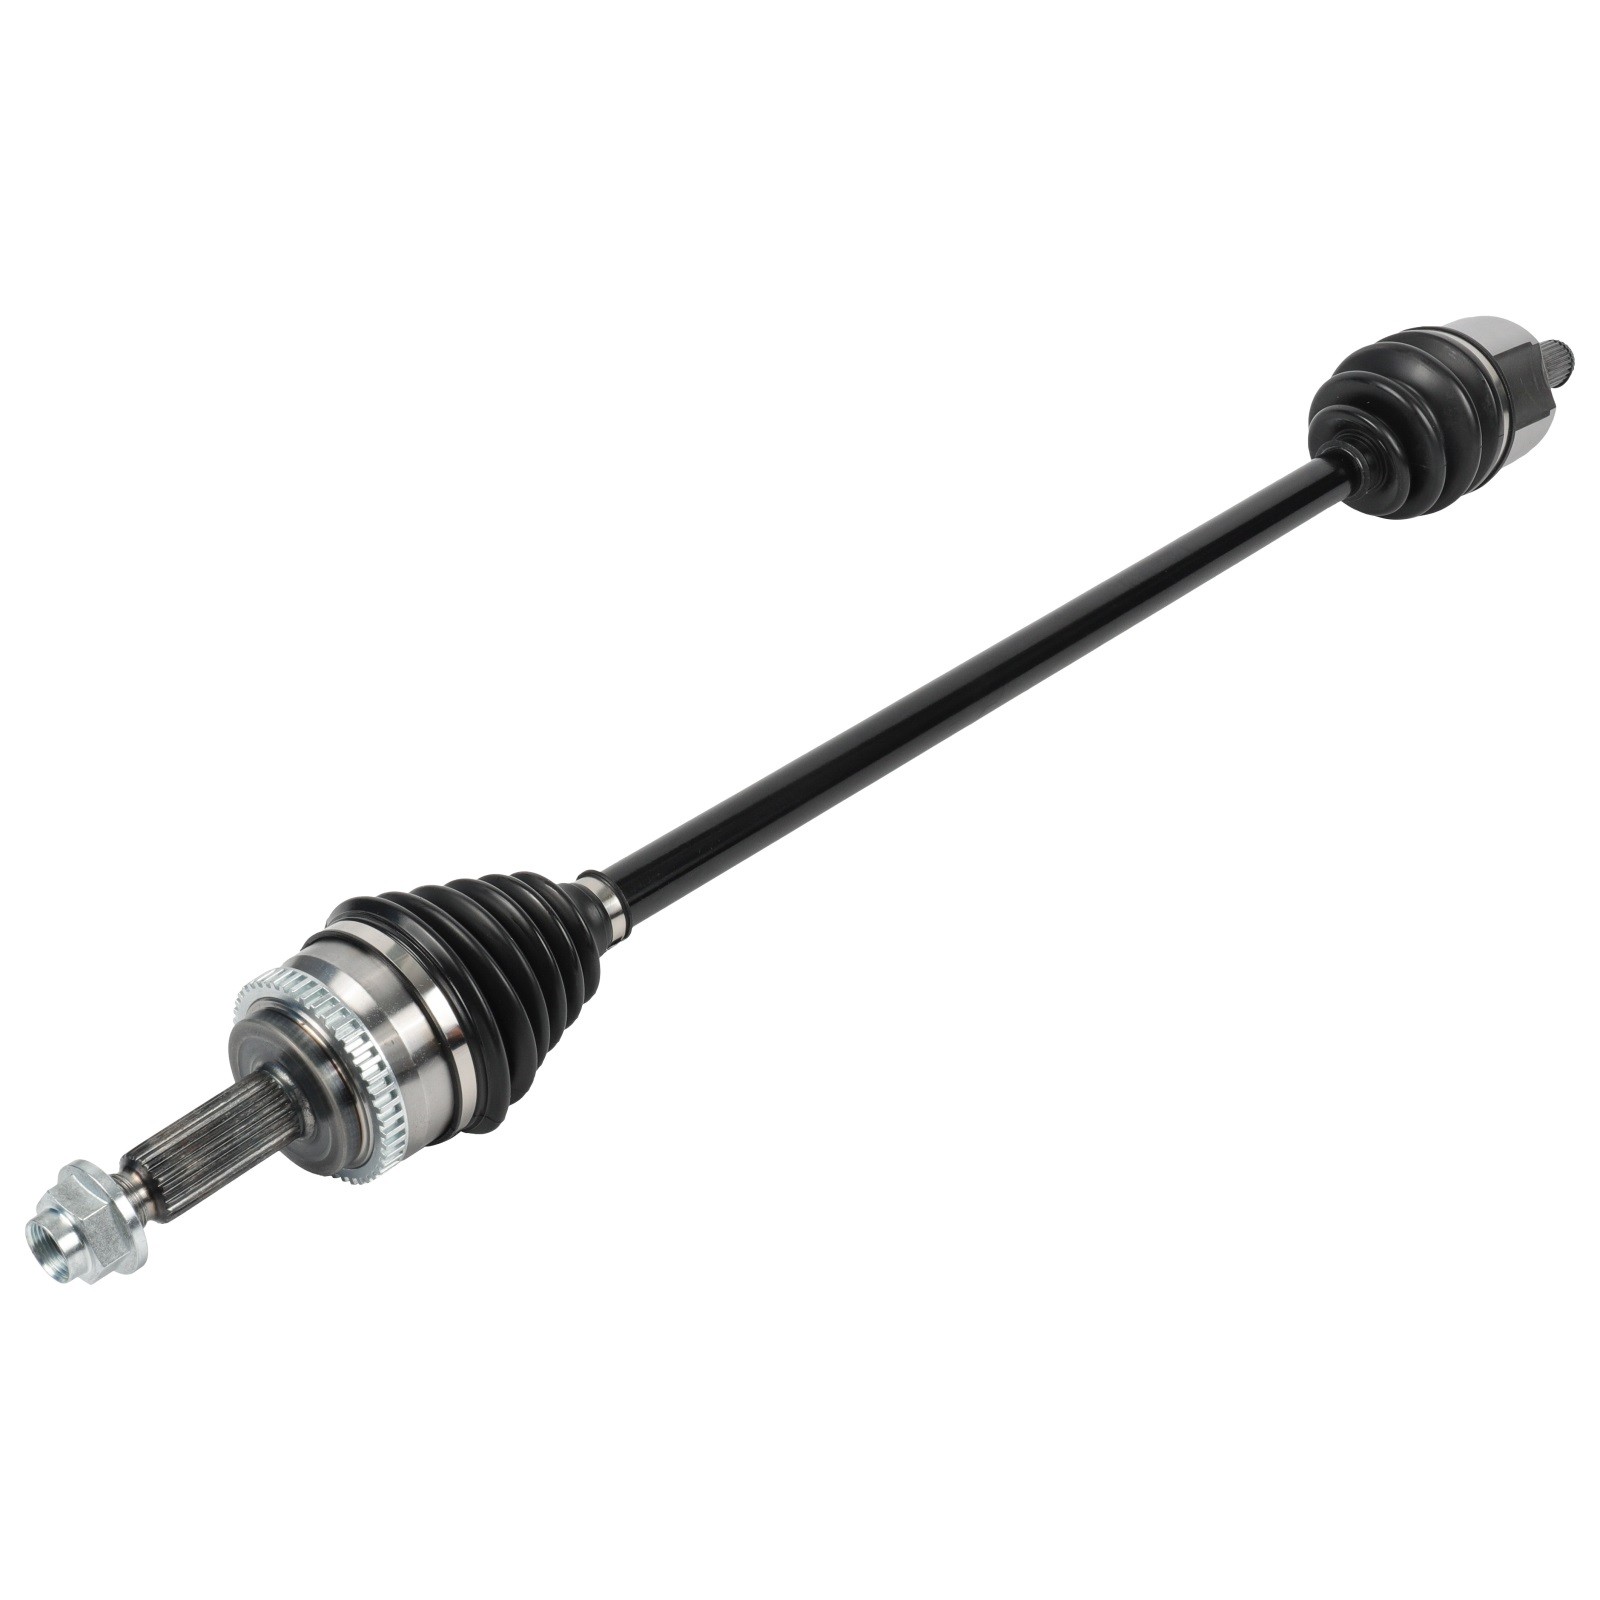
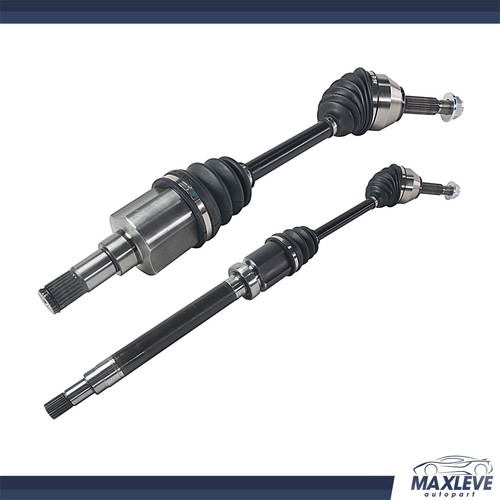
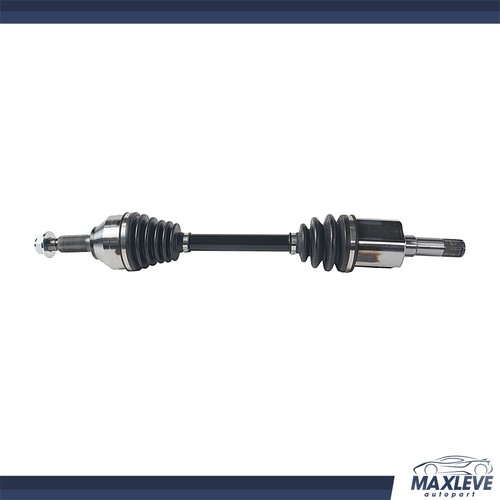
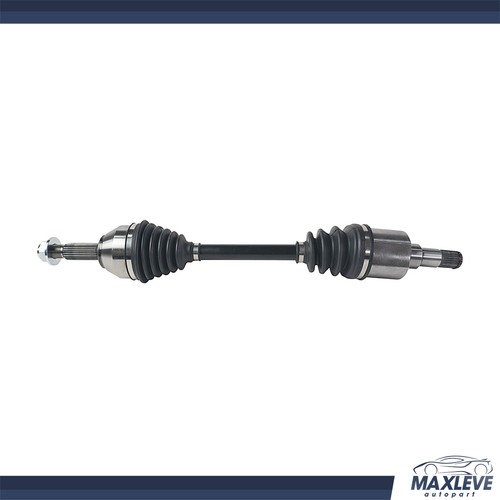
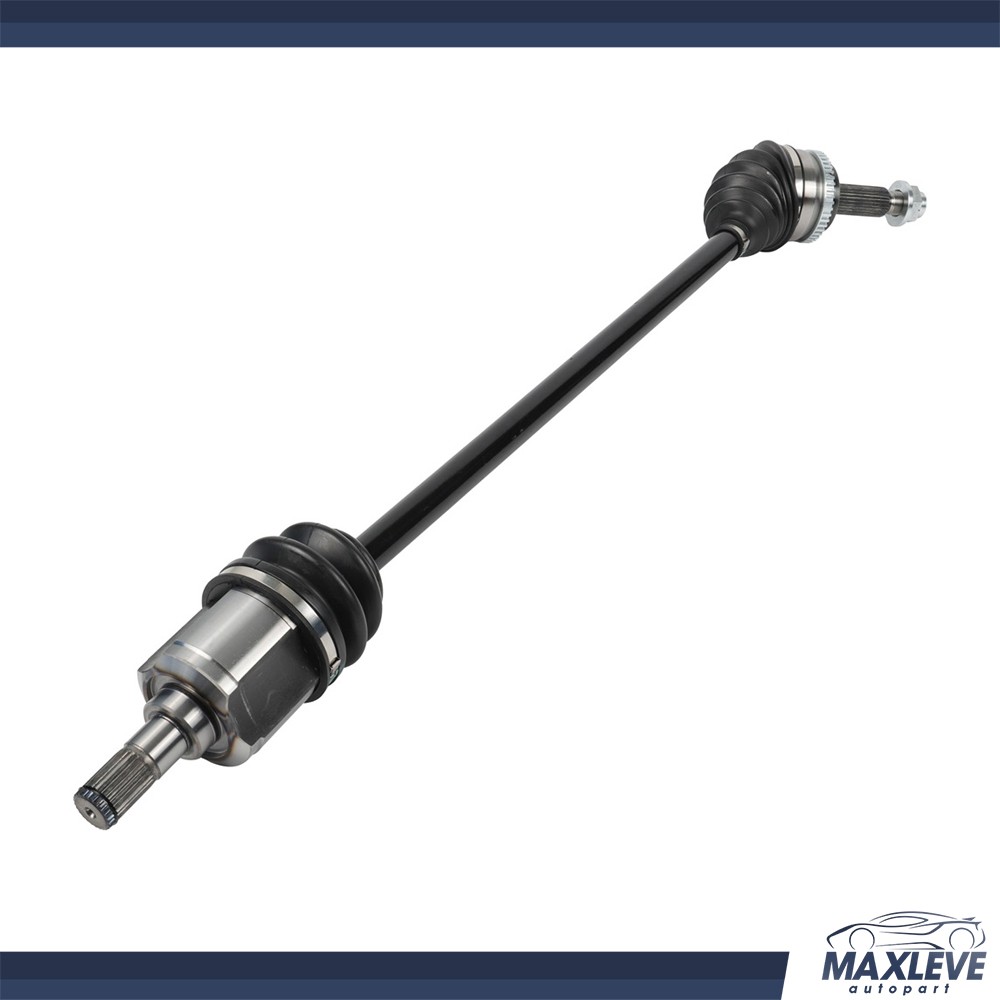
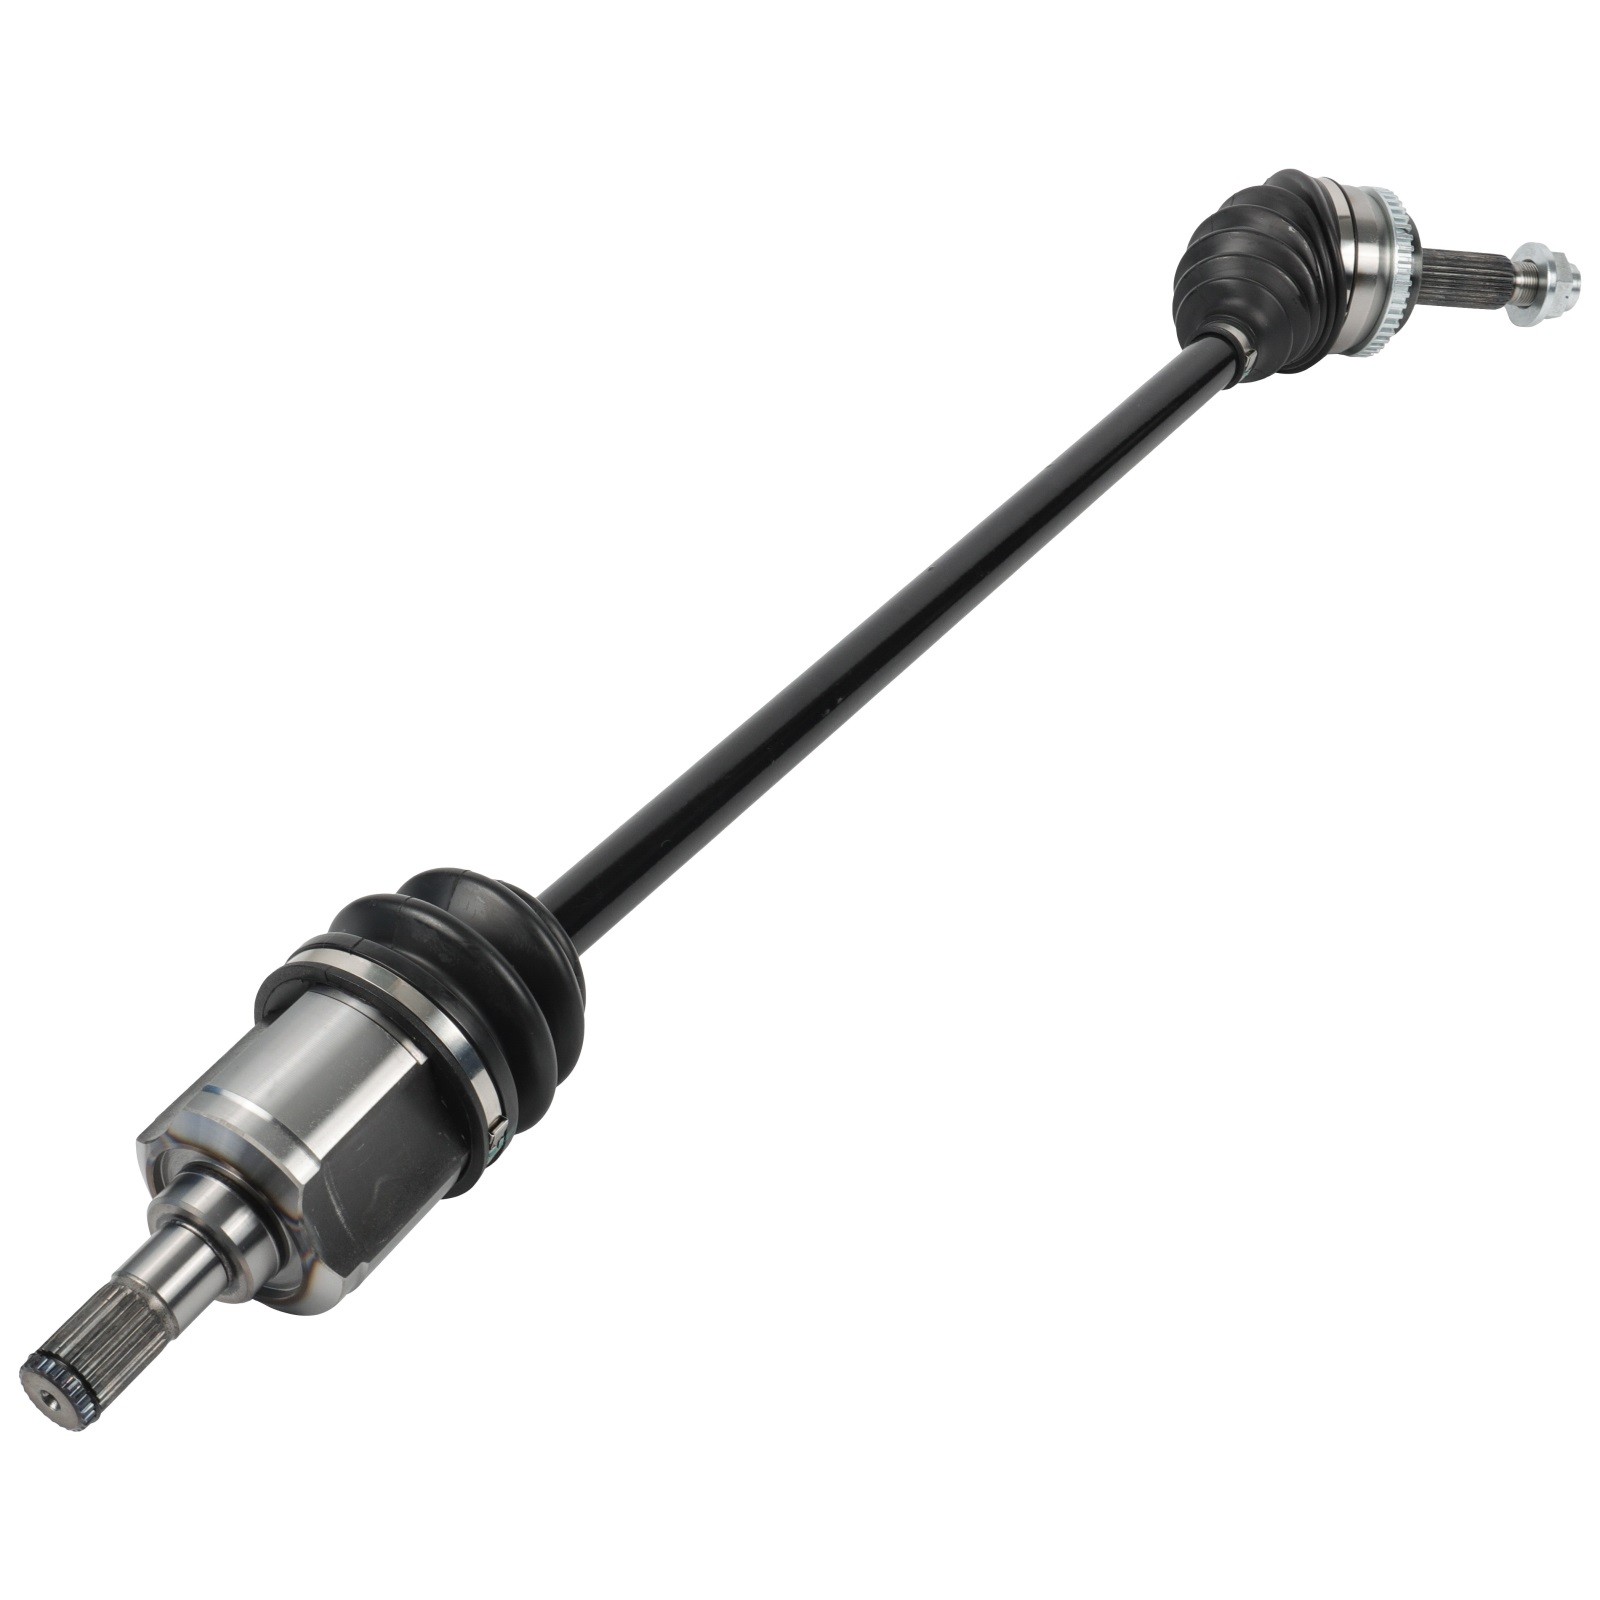
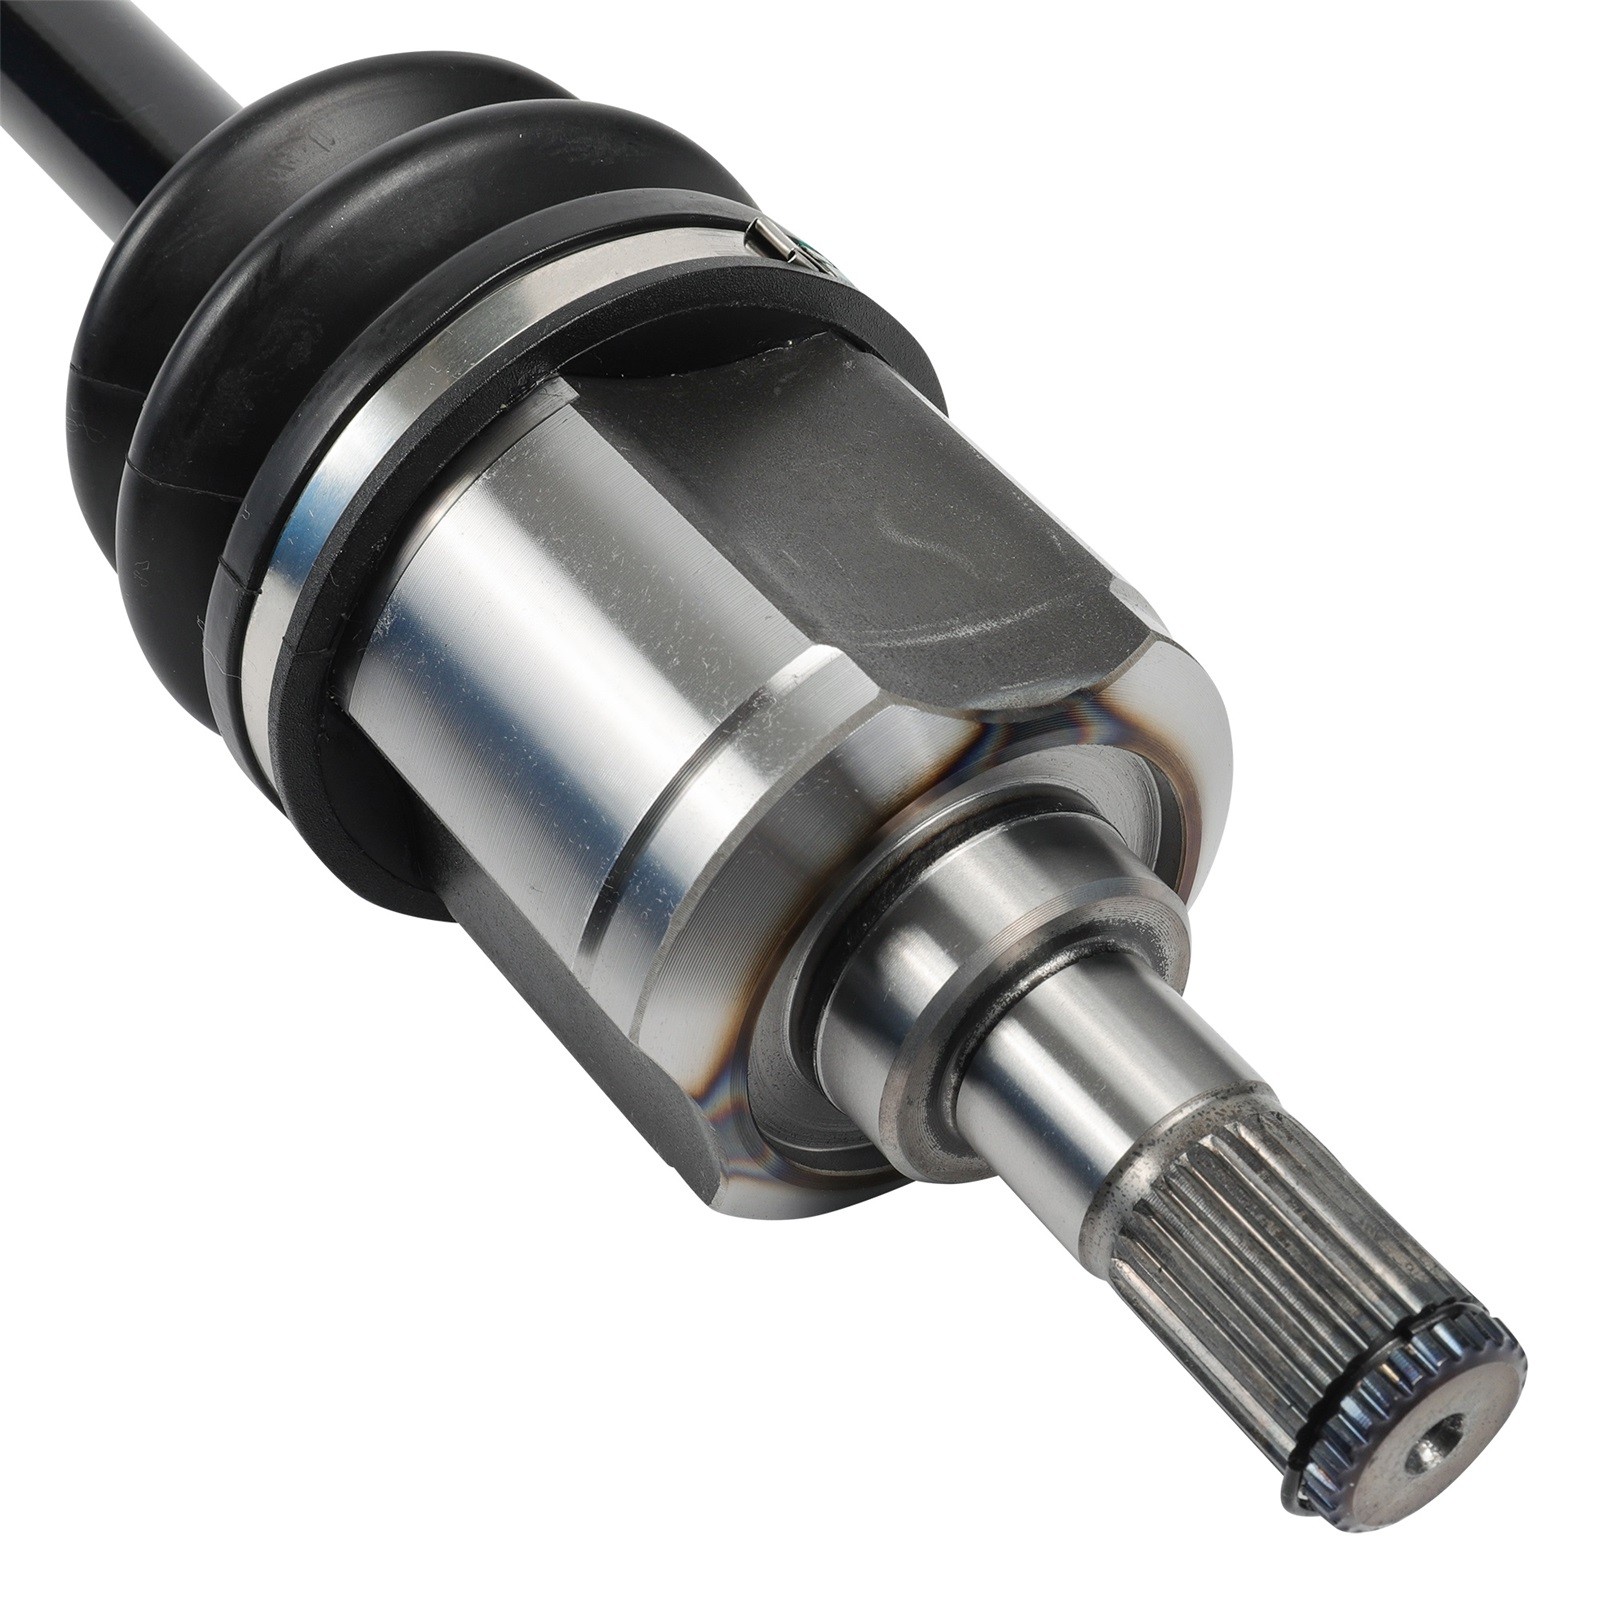
Maxleve-autopart Front Right CV Axle for Kia Soul 2014-2018 L4 1.6L Manual Transmission


|
|
|
||||||
|
|
|
|
|
|||
Vehicle Compatibility Information:
For Kia Soul 2014-2016 L4 1.6L Naturally Aspirated
For Kia Soul 2017-2018 L4 1.6L Naturally Aspirated VIN 2 (8th Digit)
Location: Front Right; Manual Transmission
What Are The Signs Of a Failing CV Axle?
You may notice a clicking sound when turning the wheel or accelerating and feel a vibration as the vehicle is in motion. You may also notice grease on the inside of your wheels or tires as the lubricant leaks out from a damaged CV boot.
The steps and tools needed for an CV axle replacement
This is a challenging and technical project
Tool List
Jack
Jack stands
Automotive tool set (pliers, screwdrivers, sockets)
Pry bar
Lubricant
Brake Cleaner
Hammer or mallet
Impact wrench (optional)
CV axle replacement
Pro Tip
Additional specialized tools such as tie-rod end pullers, ball joint removers, and vehicle-specific sockets may be required
1. Slightly loosen the wheel lug nuts. Raise and secure the vehicle. Remove the wheels. Remove the cotter pin. Unlock the spindle nut safety fastener according to the repair manual instructions.
Tip: Leave one side assembled while you work on the other so you can remember how things go back together.
2. Loosen the nut with a proper socket and breaker bar. Another bar or large screwdriver wedged between the lug nuts can help hold the wheel in place. Brake application simplifies the wheel turn issue.
3. On some vehicles, the brake caliper and rotor must be removed before proceeding. Refer to your repair manual for your vehicle's requirements. If you find yourself having to remove the brake caliper, suspend it from a point on the fFor Rame or wheel well with a length of coat hanger wire so it doesn't hang from its brake hose.
4. Remove the cotter pin and castle nut from the lower ball-joint. Disconnect the ball-joint from the steering knuckle with a removal tool (your pickle fork is likely to come in handy here). Swing the knuckle and hub outward to free the outboard axle assembly.
5. Gently wedge a pry bar or a large flat blade screwdriver between the axle and transmission. Carefully pry the axle assembly away from the transmission. Be careful not to damage any transmission seals.
6. The drive axle assembly should now slide right out. Take a good look at the drive assembly location, and then remove. The new one will go back the same way.
7. Grease the splines before insertion with gear grease. Insert the replacement drive axle assembly and reverse the disassembly process. Torque all fasteners to specification. Don't forget to use new cotter pins.
Noticed
-Instruction is not included. Professional installation is recommended
-Accessories: You will get exactly showing in the picture
-Please confirm your original part number before purchasing
-Please contact us for anything we can help you with
| Item Specifics | |
|---|---|
| Brand | Maxleve-autopart |
| Manufacturer Part Number | MA18253001x |
| Interchange Part Number | KA-8080,49501B2100 |
| Manufacturer Warranty | 1 Year |
| Superseded Part Number | NCV75053 |
| California Prop 65 Warning | Yes |
| Fitment Type | Direct Replacement |
| Compatible Makes | For Kia |
| Model | Soul |
| Year | 2014-2018 |
| Engine | L4 1.6L |
| Engine Type | Naturally Aspirated |
| Transmission | Manual Transmission |
| Note | For For Kia Soul 2017-2018 fit the model with VIN 2 (8th Digit) |
| Placement on Vehicle | Front Right |
Thank you for your support so much.
We do not ship to P.O. Boxes, APO/FPO or Military Mail Box.
We offer a 30 days Free Return
We fully understand how challenging it is to be a successful transaction. If you are not satisfied with our products, please do not hesitate to tell us, our sales representatives will try the best to make you happy. Customer satisfaction is our priority consideration!
WARNING: Please confirm compatibility again
Shop Category Delivery Help & Info Payment Policy Shipping Policy Return Policy FAQ About Us |
Front Right CV Axle for Kia Soul 2014-2018 L4 1.6L Manual Transmission
Vehicle Compatibility Information: For Kia Soul 2014-2016 L4 1.6L Naturally Aspirated
What Are The Signs Of a Failing CV Axle? You may notice a clicking sound when turning the wheel or accelerating and feel a vibration as the vehicle is in motion. You may also notice grease on the inside of your wheels or tires as the lubricant leaks out from a damaged CV boot.
The steps and tools needed for an CV axle replacement This is a challenging and technical project Tool List Jack Jack stands Automotive tool set (pliers, screwdrivers, sockets) Pry bar Lubricant Brake Cleaner Hammer or mallet Impact wrench (optional) CV axle replacement Pro Tip 1. Slightly loosen the wheel lug nuts. Raise and secure the vehicle. Remove the wheels. Remove the cotter pin. Unlock the spindle nut safety fastener according to the repair manual instructions. Tip: Leave one side assembled while you work on the other so you can remember how things go back together. 2. Loosen the nut with a proper socket and breaker bar. Another bar or large screwdriver wedged between the lug nuts can help hold the wheel in place. Brake application simplifies the wheel turn issue. 3. On some vehicles, the brake caliper and rotor must be removed before proceeding. Refer to your repair manual for your vehicle's requirements. If you find yourself having to remove the brake caliper, suspend it from a point on the fFor Rame or wheel well with a length of coat hanger wire so it doesn't hang from its brake hose. 4. Remove the cotter pin and castle nut from the lower ball-joint. Disconnect the ball-joint from the steering knuckle with a removal tool (your pickle fork is likely to come in handy here). Swing the knuckle and hub outward to free the outboard axle assembly. 5. Gently wedge a pry bar or a large flat blade screwdriver between the axle and transmission. Carefully pry the axle assembly away from the transmission. Be careful not to damage any transmission seals. 6. The drive axle assembly should now slide right out. Take a good look at the drive assembly location, and then remove. The new one will go back the same way. 7. Grease the splines before insertion with gear grease. Insert the replacement drive axle assembly and reverse the disassembly process. Torque all fasteners to specification. Don't forget to use new cotter pins.
Noticed -Instruction is not included. Professional installation is recommended -Accessories: You will get exactly showing in the picture -Please confirm your original part number before purchasing -Please contact us for anything we can help you with Thank you for your support so much. We do not ship to P.O. Boxes, APO/FPO or Military Mail Box. We offer a 30 days Free Return We fully understand how challenging it is to be a successful transaction. If you are not satisfied with our products, please do not hesitate to tell us, our sales representatives will try the best to make you happy. Customer satisfaction is our priority consideration! WARNING: Please confirm compatibility again All right reserved. |
||||||||||||||
| Brand: | Maxleve-autopart |
|---|---|
| Isin: | ILSGHGUMZYVJ |
Shop confidently on IBspot, receive your item as described or your money back for eligible orders. Learn Program Terms

30 days money back guarantee, no additional fee charged.
We provide 24/7 online customer support via email.
One week domestic shipping. Global delivery to the US in 2 weeks.

|
|
||||||

|
|

|
|
|||
Vehicle Compatibility Information:
For Kia Soul 2014-2016 L4 1.6L Naturally Aspirated
For Kia Soul 2017-2018 L4 1.6L Naturally Aspirated VIN 2 (8th Digit)
Location: Front Right; Manual Transmission
What Are The Signs Of a Failing CV Axle?
You may notice a clicking sound when turning the wheel or accelerating and feel a vibration as the vehicle is in motion. You may also notice grease on the inside of your wheels or tires as the lubricant leaks out from a damaged CV boot.
The steps and tools needed for an CV axle replacement
This is a challenging and technical project
Tool List
Jack
Jack stands
Automotive tool set (pliers, screwdrivers, sockets)
Pry bar
Lubricant
Brake Cleaner
Hammer or mallet
Impact wrench (optional)
CV axle replacement
Pro Tip
Additional specialized tools such as tie-rod end pullers, ball joint removers, and vehicle-specific sockets may be required
1. Slightly loosen the wheel lug nuts. Raise and secure the vehicle. Remove the wheels. Remove the cotter pin. Unlock the spindle nut safety fastener according to the repair manual instructions.
Tip: Leave one side assembled while you work on the other so you can remember how things go back together.
2. Loosen the nut with a proper socket and breaker bar. Another bar or large screwdriver wedged between the lug nuts can help hold the wheel in place. Brake application simplifies the wheel turn issue.
3. On some vehicles, the brake caliper and rotor must be removed before proceeding. Refer to your repair manual for your vehicle's requirements. If you find yourself having to remove the brake caliper, suspend it from a point on the fFor Rame or wheel well with a length of coat hanger wire so it doesn't hang from its brake hose.
4. Remove the cotter pin and castle nut from the lower ball-joint. Disconnect the ball-joint from the steering knuckle with a removal tool (your pickle fork is likely to come in handy here). Swing the knuckle and hub outward to free the outboard axle assembly.
5. Gently wedge a pry bar or a large flat blade screwdriver between the axle and transmission. Carefully pry the axle assembly away from the transmission. Be careful not to damage any transmission seals.
6. The drive axle assembly should now slide right out. Take a good look at the drive assembly location, and then remove. The new one will go back the same way.
7. Grease the splines before insertion with gear grease. Insert the replacement drive axle assembly and reverse the disassembly process. Torque all fasteners to specification. Don't forget to use new cotter pins.
Noticed
-Instruction is not included. Professional installation is recommended
-Accessories: You will get exactly showing in the picture
-Please confirm your original part number before purchasing
-Please contact us for anything we can help you with
| Item Specifics | |
|---|---|
| Brand | Maxleve-autopart |
| Manufacturer Part Number | MA18253001x |
| Interchange Part Number | KA-8080,49501B2100 |
| Manufacturer Warranty | 1 Year |
| Superseded Part Number | NCV75053 |
| California Prop 65 Warning | Yes |
| Fitment Type | Direct Replacement |
| Compatible Makes | For Kia |
| Model | Soul |
| Year | 2014-2018 |
| Engine | L4 1.6L |
| Engine Type | Naturally Aspirated |
| Transmission | Manual Transmission |
| Note | For For Kia Soul 2017-2018 fit the model with VIN 2 (8th Digit) |
| Placement on Vehicle | Front Right |
Thank you for your support so much.
We do not ship to P.O. Boxes, APO/FPO or Military Mail Box.
We offer a 30 days Free Return
We fully understand how challenging it is to be a successful transaction. If you are not satisfied with our products, please do not hesitate to tell us, our sales representatives will try the best to make you happy. Customer satisfaction is our priority consideration!
WARNING: Please confirm compatibility again
Shop Category Best Sales
Delivery
Newly Listed
Help & Info Payment Policy Shipping Policy Return Policy FAQ About Us |
Front Right CV Axle for Kia Soul 2014-2018 L4 1.6L Manual Transmission
Vehicle Compatibility Information: For Kia Soul 2014-2016 L4 1.6L Naturally Aspirated
What Are The Signs Of a Failing CV Axle? You may notice a clicking sound when turning the wheel or accelerating and feel a vibration as the vehicle is in motion. You may also notice grease on the inside of your wheels or tires as the lubricant leaks out from a damaged CV boot.
The steps and tools needed for an CV axle replacement This is a challenging and technical project Tool List Jack Jack stands Automotive tool set (pliers, screwdrivers, sockets) Pry bar Lubricant Brake Cleaner Hammer or mallet Impact wrench (optional) CV axle replacement Pro Tip 1. Slightly loosen the wheel lug nuts. Raise and secure the vehicle. Remove the wheels. Remove the cotter pin. Unlock the spindle nut safety fastener according to the repair manual instructions. Tip: Leave one side assembled while you work on the other so you can remember how things go back together. 2. Loosen the nut with a proper socket and breaker bar. Another bar or large screwdriver wedged between the lug nuts can help hold the wheel in place. Brake application simplifies the wheel turn issue. 3. On some vehicles, the brake caliper and rotor must be removed before proceeding. Refer to your repair manual for your vehicle's requirements. If you find yourself having to remove the brake caliper, suspend it from a point on the fFor Rame or wheel well with a length of coat hanger wire so it doesn't hang from its brake hose. 4. Remove the cotter pin and castle nut from the lower ball-joint. Disconnect the ball-joint from the steering knuckle with a removal tool (your pickle fork is likely to come in handy here). Swing the knuckle and hub outward to free the outboard axle assembly. 5. Gently wedge a pry bar or a large flat blade screwdriver between the axle and transmission. Carefully pry the axle assembly away from the transmission. Be careful not to damage any transmission seals. 6. The drive axle assembly should now slide right out. Take a good look at the drive assembly location, and then remove. The new one will go back the same way. 7. Grease the splines before insertion with gear grease. Insert the replacement drive axle assembly and reverse the disassembly process. Torque all fasteners to specification. Don't forget to use new cotter pins.
Noticed -Instruction is not included. Professional installation is recommended -Accessories: You will get exactly showing in the picture -Please confirm your original part number before purchasing -Please contact us for anything we can help you with Thank you for your support so much. We do not ship to P.O. Boxes, APO/FPO or Military Mail Box. We offer a 30 days Free Return We fully understand how challenging it is to be a successful transaction. If you are not satisfied with our products, please do not hesitate to tell us, our sales representatives will try the best to make you happy. Customer satisfaction is our priority consideration! WARNING: Please confirm compatibility again All right reserved. |
||||||||||||||||||||||||||||||||||||||||||||||||||||||
We currently ship to addresses within the United States only.
Products may ship from:
Each product page clearly displays the “Ships From” location before checkout.
| Shipping Method | Estimated Delivery | Cost |
|---|---|---|
| Free Shipping (US) | 5–10 business days | Free, available on eligible items |
| Standard Shipping (US to US by Item) | 5–10 business days | $6.50 for the first item, $2.00 each additional |
| Standard Shipping (From US Warehouse by Weight) | 3–7 business days | Starts at $6.50, increasing by $2 for every additional 4 oz (0.25 lb) up to 1 lb, then by $4 for each additional pound beyond 1 lb. |
| Extended Delivery (Ships from Overseas Warehouse) | 10–15 business days | $14.50 for the first item, $2.00 each additional |
Shipping costs vary by product weight, quantity and origin. Exact rates and delivery estimates are displayed on each product page and confirmed during checkout.
We offer free standard shipping on select products or during promotional periods. Availability of free shipping will be displayed on the product page and at checkout.
We primarily use USPS and UPS for U.S. deliveries. Items shipped from international warehouses may be handled by partner carriers depending on the country of origin.
All import duties and taxes for goods imported into the United States are included in the product price. There are no hidden fees or additional charges at checkout.
Every order is fully trackable. You will receive a tracking number via email once your order ships. If your order ships in multiple packages, each package will have its own tracking number. If you don’t receive a shipping confirmation immediately, your order is still being processed and will arrive within the estimated timeframe shown at checkout.
You can track your shipment anytime using the Track Your Order page on our website.
If you need to modify or cancel an order, please contact our customer support team as soon as possible. Orders can only be canceled before they ship. Once shipped, cancellations are not possible, but you may request a return after the item is delivered.
Contact: support@ibspot.com
If your tracking number shows “Delivered” but you haven’t received your package:
If your package arrives damaged or fails to arrive, please contact us immediately. For deliveries to P.O. boxes, ibspot is not responsible for damage caused by weather, temperature, or theft.
For any questions about shipping, tracking, or delivery, our customer support team is here to help.
Email: support@ibspot.com
We’re always happy to help.
Please read our policy carefully before making a purchase.
We aim to ensure every customer has a smooth and transparent experience with ibspot.com.
Customers may request to cancel an order before it has been shipped.
Once the package has been shipped, cancellations are no longer possible; however, you may still request a return after receiving your order.
You can contact us through:
Please submit your cancellation request as soon as possible after placing the order to allow us to process it before shipment.
We accept returns for most items within 30 days of delivery for a full refund.
To be eligible for a return:
Certain products cannot be returned, including:
Partial refunds may be granted in specific situations, such as:
To initiate a return, please contact us at support@ibspot.com with your order number and details about the product you wish to return.
Our team will provide you with return instructions and a prepaid return label.
Please contact us before returning any item.
We will provide a free return shipping label.
If a return is sent back without prior contact or without our provided label, we cannot be held responsible for return shipping costs.
For items valued over $75, we recommend using a trackable shipping service or purchasing shipping insurance.
We cannot guarantee that we will receive your returned item if shipped independently.
Once your return is received and inspected:
Please allow:
Please inspect your order immediately upon receipt.
If you receive a defective, damaged, or incorrect item, contact us right away at support@ibspot.com.
We’ll evaluate the issue promptly and make it right.
Before purchasing, please review product details carefully.
If there is a problem with your order upon arrival, visit our Support Center or contact us directly to arrange return shipping or replacement.
We do not process direct exchanges.
The fastest way to get what you need is to return the original item and place a new order once your return is accepted.
IBSPOT Return Center
15 Sawmill Ln
Dover Plains, NY 12522
United States
Our support team is available 24/7 to assist with cancellations, returns, or general inquiries.
Email: support@ibspot.com
Contact Form: Contact Us page
Oops!
Sorry, it looks like some products are not available in selected quantity.
Subscribe To Our Newsletter
Disclaimer: Statements made, or products sold through this website, have not been evaluated by the United States Food and Drug Administration. Products are not intended to diagnose, treat, cure or prevent any disease.